
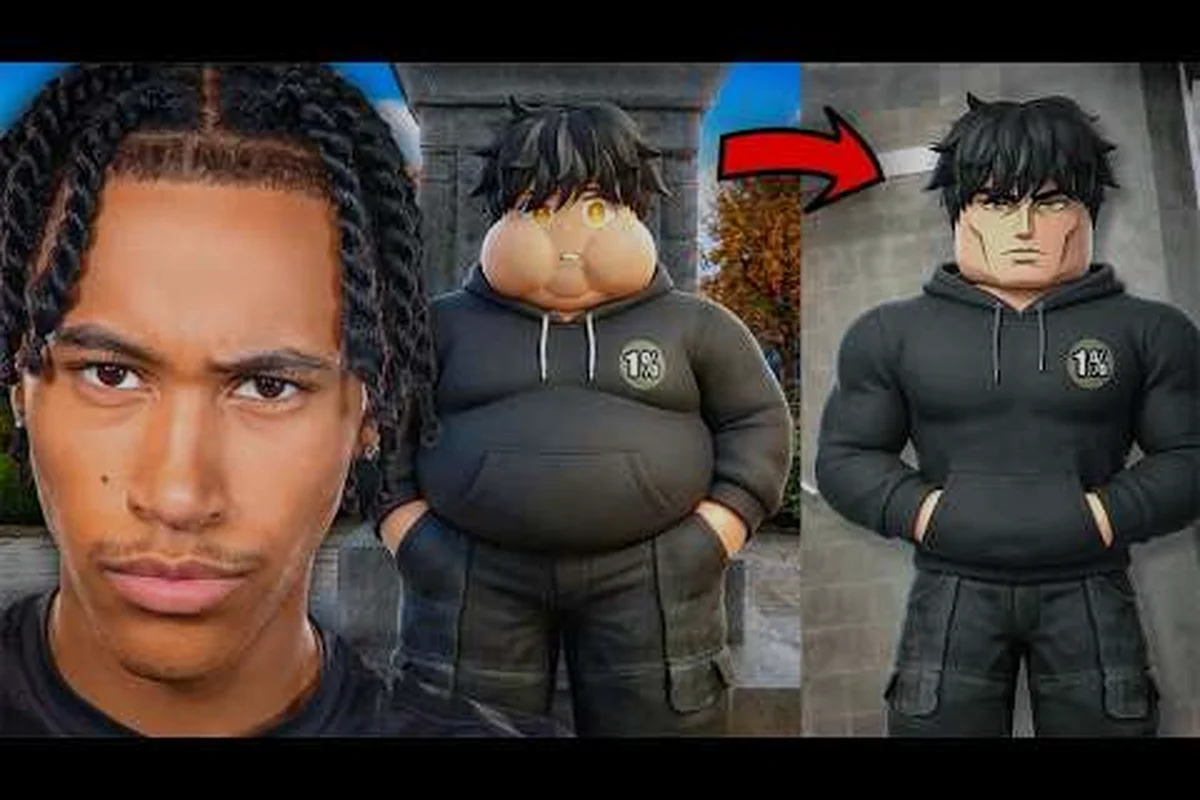
A dominant Mog or Die face build separates the players who actually win MOG Battles from the ones who look good standing still. Face is the most contested look stat on the server, which means every Hammer pickup is a small warzone, and farming it without a plan burns hours for almost no progress. This guide lays out the fastest path to a maxed Face, the stat priority that keeps your build competitive, and the pickup rotations that veteran moggers use to stay ahead of the lobby.
Understanding the Face Stat in Mog or Die
Mog or Die has four look stats, and each one feeds a different part of your mogging score. Height is raised by Milk, Face is raised by Hammers, Frame is built with Picture Frames, and Bodyfat is lowered by drinking Water. The full breakdown of the four stats and their pickups is listed on the official Mog or Die Roblox page, which is the cleanest source for what each collectible actually does.
Face sits in the middle of the priority list for most successful players, but it carries the most weight inside MOG Battles, where the NPC judge is essentially scoring your jaw, brow, and overall facial structure. A player with a mid Height and a maxed Face will outscore a lanky opponent with a flat face almost every time, which is why the Face stat has become the single most farmed number in the entire game.
Why Face Outscores Height in MOG Battles
Height is the showy stat that beats early NPCs, and most new players chase it first because taller characters feel stronger the moment you load in. Once you reach the mid lobbies, however, Height hits a soft ceiling: every tall player looks roughly the same from a judge's perspective, and the tiebreaker almost always falls to Face. Community testing reported by players on the Mog or Die Discord suggests that a maxed Face adds roughly 30% more to your MOG Battle score than an equivalent investment in Height, which is why smart farmers pivot to Hammers as soon as their Height stops winning them duels.
| Stat | Primary Pickup | Effect | MOG Battle Weight | Best Phase to Farm |
|---|---|---|---|---|
| Height | Milk | Raises character height | High (early game) | First 30 minutes |
| Face | Hammer | Improves facial structure | Highest (mid-late game) | Hours 1-4 |
| Frame | Picture Frame | Builds body frame | High (tank role) | Mid game |
| Bodyfat | Water | Lowers body fat % | Medium (cleanup) | Last 10% of build |
The table above is a reasonable priority order for the vast majority of players, but the Face line is the one that moves the most during a session. If you want a deeper look at how Height compares to Face during the early hours, the height farming guide walks through the early-game pickup routes that get you out of the newbie lobbies and into the Face grind.
What "Max Face" Actually Looks Like
Max Face does not turn your character into a completely different person, but it does sharpen the jawline, raise the brow ridge, and tighten the cheek structure until your avatar reads as objectively "mugged out" from any camera angle. The visual effect is subtle in screenshots and dramatic in motion, which is exactly why Face is so important during live MOG duels where the judge sees your character rotate and emote. Players who only check their stats menu often miss how much their Face is actually changing, so a quick test in a low-stakes MOG Battle is the fastest way to confirm whether your Hammer grind is paying off.
Mog or Die Face Build: Core Stat Priority
A clean Mog or Die face build follows a strict stat priority that almost no new player gets right on their first attempt. The order is Height into Face into Frame, with Bodyfat saved for a cleanup pass at the end, and every slot in that order has a reason tied to how the MOG Battle scoring formula works.
Stage 1: Height Until You Stop Winning
Farm Milk until you can clear the early NPCs on autopilot, because every minute spent on Height past that point is a minute stolen from Face. Most players hit that wall around the 30-minute mark, and the transition is usually obvious: MOG Battles that you were winning at 80% accuracy suddenly drop to coin flips because your opponents are the same Height as you. The minute that happens, stop drinking Milk and walk directly to the nearest Hammer spawn.
Stage 2: Face Is the Main Course
Face is the stat that wins MOGs in the current meta, and it is also the stat that drains your time the hardest because Hammer pickups are spread across the map and respawn on a long timer. A serious Face grind needs a route, not a wander-and-pray plan, which is exactly what the next section covers.
Stage 3: Frame as a Side Investment
Frame is built with Picture Frames and adds the tank-stat element to your build. A Mog or Die frame build is not the focus of this guide, but you should keep picking up Picture Frames whenever you walk past them on the way between Hammer spawns, because Frame compounds quietly and pays off in the late game when lobbies start filtering for tougher opponents.
Stage 4: Bodyfat Cleanup Last
The Mog or Die low bodyfat build is the final polish on a competitive mogger. Bodyfat is lowered with Water pickups, and the visual effect is the difference between a soft look and a sharp look once every other stat is maxed. Leave Bodyfat for last because chasing it early is the single most common mistake that locks new players out of the Face grind.
| Build Stage | Target Stat | Pickup | Time Budget | Reason to Stop |
|---|---|---|---|---|
| 1 | Height | Milk | ~30 min | Losing fewer than 20% of MOGs |
| 2 | Face | Hammer | 1-4 hours | Face reads "maxed" in MOG previews |
| 3 | Frame | Picture Frame | Passive | Frame is high enough to tank mid lobbies |
| 4 | Bodyfat | Water | Final 10% | Visual cut reads sharp in screenshots |
Hammer Farming Routes for a Fast Face Build
Stat farming in Mog or Die is only as fast as your pickup route, because every Hammer you miss to a more efficient player is roughly 30 seconds of Face progress you will never recover. The community has settled on three Hammer loops that cover almost every spawn location, and rotating between them is the single biggest speed boost you can give your grind.
Loop A: The Lobby Loop
The Lobby Loop covers the spawn area and the immediate ring of buildings around it, which is where most new players spend their first 20 minutes. The loop is short, the Hammers respawn fast, and the traffic is heavy, so the actual pickup rate is closer to one Hammer per minute once you factor in the mob of beginners. Use this loop for warm-up and for sessions when you are not trying to push your Face stat hard, because the social value of being near other players usually outweighs the pickup efficiency.
Loop B: The Mid-Map Sweep
The Mid-Map Sweep is the workhorse route for any serious Mog or Die face build. It covers the cluster of Hammer spawns between the central plaza and the outer ring, and it is long enough that you usually clear it solo before the first Hammer respawns. According to community data shared by veteran moggers, this loop produces roughly 2-3 Face progress per minute when run cleanly, which is the baseline that every other route is measured against.
| Route | Hammers per Loop | Time per Loop | Effective Face/min | Best Use |
|---|---|---|---|---|
| Lobby Loop | 4-5 | 4 min | ~1.1 | Warm-up, casual play |
| Mid-Map Sweep | 9-11 | 5 min | ~2.0 | Main grind route |
| Outer Ring | 6-8 | 6 min | ~1.2 | Off-peak sessions |
Loop C: The Outer Ring
The Outer Ring covers the sparse Hammer spawns along the map's edge, and it is the route that most players only run during off-peak hours when the rest of the map is empty. Pickup density is lower, but competition is also near zero, which makes it the cleanest option for solo grinders who want a quiet session. If you want a deeper breakdown of the Golden pickups and rare spawns that show up on this loop, the Face farm guide maps out the specific spawn windows that experienced players target.
Golden Hammer Priority
Golden pickups are the rare drops that boost Face faster than standard Hammers, and they are the entire reason a serious Mog or Die pickup guide exists. Each Golden Hammer roughly equals 3-4 normal Hammers of Face progress, which means landing one is the equivalent of clearing an entire Mid-Map Sweep in a single pickup. The spawn pattern is not officially documented, but community testing reported by players suggests that Golden Hammers are more likely to appear in the Mid-Map and Outer Ring zones during off-peak hours, which is a second reason to rotate away from the busy Lobby Loop as soon as your Height phase ends.
Item Guide: Pickups That Actually Move Your Face Build
A complete Mog or Die item guide covers more than just Hammers, because the supporting pickups determine whether your Face progress sticks or gets erased by a bad MOG roll. The four key pickups to track during a Face-focused session are standard Hammers, Golden Hammers, Milk (for Height bleed), and Water (for Bodyfat bleed), and each one has a specific role in keeping your build clean.
| Pickup | Stat Affected | Rarity | Face Build Priority | Notes |
|---|---|---|---|---|
| Standard Hammer | Face | Common | 1 | Backbone of the grind |
| Golden Hammer | Face | Rare | 1 (massive) | Worth a full map detour |
| Milk | Height | Common | 4 | Skip unless Height is low |
| Picture Frame | Frame | Common | 3 | Pick up while passing |
| Water | Bodyfat (-%) | Common | 2 late, 5 early | Save for cleanup pass |
Standard Hammer: The Grind Pickup
Standard Hammers are the pickup that does 90% of the work in any Face build, and they are common enough that you should never be more than 30 seconds from one if you are running a proper route. The mistake that most new players make is grabbing a Hammer and standing still to admire the Face animation, which burns the respawn window and hands the next Hammer to whoever runs past. Keep moving, and your effective Face per hour roughly doubles.
Golden Hammer: The Build-Changer
Golden Hammers are the pickup that flips an average Face build into a meta build in a single drop. They spawn randomly across all three loops, and the best strategy is to keep one eye on the chat and the other on the floor, because players tend to ping Golden Hammers the moment they see one. If you are too far away to contest, do not waste time running, because the next standard Hammer is worth more than the five minutes you would spend chasing a Golden that another player has already picked up.
Picture Frames and Water: The Support Cast
Picture Frames belong to a Mog or Die frame build, but picking them up passively during your Face routes is the cleanest way to keep Frame from lagging behind. Water belongs to a Mog or Die low bodyfat build, and the best practice is to ignore it entirely until your Face and Frame are both maxed, because lowering Bodyfat on an incomplete build just makes a soft character look soft and angular. If you are curious about which Frame threshold matters most for the current meta, the frame tier list ranks the Frame breakpoints where the build starts to feel tanky in MOGs.
How Genetics Change Your Face Build Order
Genetics are the hidden modifier that can flip your entire Face priority upside down, and ignoring them is the second most common mistake that locks moggers out of the top lobbies. A player who rolls into Mog or Die with strong Face genetics can max the stat in half the time of someone with weak Face genetics, and that single fact should change the order of your farming stages.
Check Your Genetics First
The first thing you should do after loading into a new Mog or Die session is open your stat screen and check the Face genetic value. A high Face roll means you can skip the Height phase almost entirely and go straight to Hammers, because your baseline Face is already competitive. A low Face roll means Height is even more important than usual, because you will need every Height point you can get to compensate for the Face deficit during the early MOGs.
Genetic Combos That Boost Face
Some genetic combinations stack Face gains faster than solo investments, and the community has flagged a few that are worth chasing if you happen to roll into them. The genetics combo guide lists the rare genetics that interact with Face directly, but the short version is that any genetic that gives a "Face on pickup" bonus will cut your farming time by a noticeable margin and should be your first priority if you are lucky enough to roll one.
| Face Genetic Value | Recommended Stage 1 | Recommended Stage 2 | Estimated Time to Max Face |
|---|---|---|---|
| Low (1-3) | Heavy Height grind | Standard Hammer route | 4-5 hours |
| Mid (4-6) | Normal Height grind | Standard Hammer route | 2-3 hours |
| High (7-9) | Skip Height | Mid-Map Sweep only | 1-1.5 hours |
| Rare Face Combo | Skip Height | Golden Hammer focus | Under 1 hour |
A complete Mog or Die tier list of the strongest builds in the current meta lines up with the table above, because every top build in the meta starts from a strong Face genetic and pivots to a Golden Hammer focus almost immediately.
Frequently Asked Questions
What is the fastest Mog or Die face build route?
The fastest Mog or Die face build route is the Mid-Map Sweep loop with Golden Hammer detours, which produces roughly 2 Face points per minute under normal traffic and much more when a Golden Hammer spawns. Run it twice per cycle and rotate to the Outer Ring during off-peak hours to keep competition low.
Should I build Frame or Face first in Mog or Die?
Build Face first in Mog or Die, because Face is the stat that wins MOGs in the current meta while Frame only matters once you are tanking mid lobbies. A Mog or Die frame build is the natural Stage 3 of any complete mogger, and it pays off passively if you pick up Picture Frames while running your Face routes.
When do I start a Mog or Die low bodyfat build?
Start a Mog or Die low bodyfat build only after your Face and Frame are both at competitive levels, because lowering Bodyfat on an unfinished build produces a soft, angular look that scores worse in MOGs than a softer build with maxed Face. The cleanup pass typically happens in the last 10% of any serious mogger's grind.
How does Mog or Die stat farming work for Hammers specifically?
Mog or Die stat farming for Hammers works by running loops that visit every spawn in a fixed order, because Hammers respawn on a server-wide timer and the player who reaches a spawn first gets the pickup. A solid Mog or Die pickup guide treats the route as the main grind and the pickups as the byproduct, which is the mindset that separates a 4-hour grind from a 1-hour grind.
Are Golden Hammers worth chasing in a Mog or Die item guide?
Yes, Golden Hammers are worth chasing in any Mog or Die item guide, because a single Golden Hammer is worth roughly 3-4 standard Hammers of Face progress and can flip an average build into a meta build. The only time to skip a Golden is when another player is already at the spawn, because contesting a Golden that you will not win is slower than running your standard route.